C E L E S T I A L M A P P I N G
Topics, methods and subjects learned:
- research
- table creation an editing
- adding X,Y data, creating events, custom shp files
- customizing projections
- georeferencing and rectifying images
- mosaicking
- cell size downsampling
- raster clipping
- managing large files
- data management
THE MOON
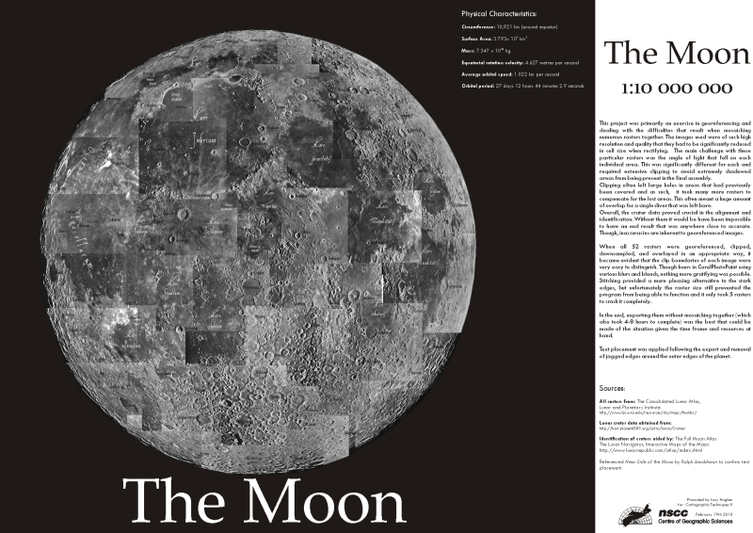
This project required the gathering of high resolution rasters of the moon, georeferencing them to crater points and assembling the rectified result in an appropriate way. As there is no readily available vector data for the Moon, this alternative provided experience with large images and various mosaicking techniques.
The map is comprised of 52 raster images that were chosen from an amazing database of lunar photographs found in Part 1 of the Consolidated Lunar Atlas on the Lunar Planetary Institute's website.
It often required a couple of attempts with particular areas and different images in order to achieve a large enough coverage. Once the rasters had been georeferenced they then needed to be clipped in order to overlap desirably before being mosaicked [this is because ArcMap cannot process the overlap between two images that have irregularly shaped edges when mosaicking]. As the clip needed to be rectangular, much of the coverage that an image gave was lost. Patching holes required an entire image to be georeferenced at times to only offer up a sliver.
Crater point data was obtained here. It was copied into a spreadsheet where unnecessary columns were deleted and the co ordinates edited in a way that ArcMap could correctly display. The file was imported into ArcMap, exported as a dBase file, applied as X,Y data and finally exported with a customized lunar projection as a shape file. With this indispensable crater information at hand, the images were checked against the interactive Full Moon Atlas where names and crater locations were corroborated.
Once all images were successfully rectified, they had to be downsampled (the file was enormous, and as such was responding badly) and were then exported together as a .tiff. The final image was imported into CorelDRAW X4 where select craters and 'oceans' were labeled.
